background

Showing posts with label Eats and Treats. Show all posts

Monday, July 4, 2016

Don't Be Blue: Sugar Free Blueberry Muffins

So in honor of July 4th (yeah sure, that's why), I am posting this great recipe for some tasty, yet healthy, blueberry muffins.

They are fluffy, berrylicious, and guilt-free since they are not loaded with as much sweets as you get in a cupcake. They are truly a muffin, meant to be a breakfast companion instead of the reason you have to now go workout an extra 10 minutes.

Quick and easy, here we go!

Sugar Free Blueberry Muffins
adapted from Betty Crocker's "Muffin" recipe


Mix your dry ingredients first.


Mix the wet ingredients in a different bowl.


Combine the two!


Add the blueberries, gently of course. You can customize how many berries you want based on preference or what you have. This recipe is meant to stand on it's own without the berries so it really doesn't matter how many you put in.


Fill muffin paper 3/4 full of batter. I got 18 muffins out of this recipe.


Ryder got a selfie in on the camera during this process. He looks pretty happy for a kid who has to wait for muffins to bake at 350 degrees for 15-20 minutes. Perhaps he's already had a bowl of cereal.


When they come out, give them a chance to cool. The blueberries remain hot a lot longer than the rest of the muffin.


And there you have it! Light fluffy goodness, all wrapped in a paper tin. They may not be the most gorgeous thing you've ever seen, but they taste amazing! Don't forget the butter!


Don't Be Blue Sugar Free Blueberry Muffins
adapted from Betty Crocker's "Muffin" recipe

2 c. flour
1/3 c. oats
3 tsp baking powder
1 tsp salt
1 c. milk
1/4 c. melted butter
1 egg
1/3 c. honey
1-2 c. fresh blueberries

Preheat oven to 400 degrees. Mix dry ingredients. In a separate bowl, mix wet ingredients; combine with dry. Don't overbeat. Add blueberries and stir in gently. Fill muffin paper 3/4 full, and bake for 15-20 minutes. Allow to cool.


Don't Be Blue: Sugar Free Blueberry Muffins

So in honor of July 4th (yeah sure, that's why), I am posting this great recipe for some tasty, yet healthy, blueberry muffins.

They are fluffy, berrylicious, and guilt-free since they are not loaded with as much sweets as you get in a cupcake. They are truly a muffin, meant to be a breakfast companion instead of the reason you have to now go workout an extra 10 minutes.

Quick and easy, here we go!

Sugar Free Blueberry Muffins
adapted from Betty Crocker's "Muffin" recipe


Mix your dry ingredients first.


Mix the wet ingredients in a different bowl.


Combine the two!


Add the blueberries, gently of course. You can customize how many berries you want based on preference or what you have. This recipe is meant to stand on it's own without the berries so it really doesn't matter how many you put in.


Fill muffin paper 3/4 full of batter. I got 18 muffins out of this recipe.


Ryder got a selfie in on the camera during this process. He looks pretty happy for a kid who has to wait for muffins to bake at 350 degrees for 15-20 minutes. Perhaps he's already had a bowl of cereal.


When they come out, give them a chance to cool. The blueberries remain hot a lot longer than the rest of the muffin.


And there you have it! Light fluffy goodness, all wrapped in a paper tin. They may not be the most gorgeous thing you've ever seen, but they taste amazing! Don't forget the butter!


Don't Be Blue Sugar Free Blueberry Muffins
adapted from Betty Crocker's "Muffin" recipe

2 c. flour
1/3 c. oats
3 tsp baking powder
1 tsp salt
1 c. milk
1/4 c. melted butter
1 egg
1/3 c. honey
1-2 c. fresh blueberries

Preheat oven to 400 degrees. Mix dry ingredients. In a separate bowl, mix wet ingredients; combine with dry. Don't overbeat. Add blueberries and stir in gently. Fill muffin paper 3/4 full, and bake for 15-20 minutes. Allow to cool.


Monday, May 30, 2016

Strawberry Fields Forever: Strawberry Shortcake

It's berry season!
 
We enjoyed our first trip of the year to the peach orchard a week ago, and have been consuming and passing out peaches like crazy. We enjoyed a new aspect of the orchard this year -
 
 
strawberry picking!
A huge field of strawberry plants and ripe strawberries all around!
 
 
Pretty yummy berries!
 
 
Sabrina had a good time and was munching on the berries as we went.
 
 
After coming home with 6 pounds of ripe strawberries, I decided to make good use of them and make some strawberry shortcake! This is the recipe my mom used when I was growing up. It's a basic cake, and we usually top it with fresh whipped cream and our recently acquired berries (we used blueberries as well when I was growing up because we always went blueberry picking).
 
 
Start by mixing all the ingredients together. The kids helped me out.
 
 
Pour into a square pan and bake.
 
 
Lick the spoon, bowl and whatever else has the yummy batter on it while the cake bakes.
 
 
Let the cake cool before adding all your goodies.
 
 
Cut up the cake and top with berries and fresh whipped cream.
 
 
So delicious and a perfect early summer treat!
 
 
Strawberry Shortcake
from the Betty Crocker cookbook - aka "Dinette Cake"
 
1 1/4 c. flour
1 c. brown sugar
1 1/2 tsp baking powder
1/2 tsp salt
3/4 c. milk
1/3 c. butter or oil
1 egg
1 tsp vanilla
 
Preheat oven to 350 degrees. Grease a 9x9 square baking dish.
 
Measure all ingredients in mixing bowl, beat until well combined. Pour in to prepared pan. Bake for 35-40 minutes. Let cake cool. Cut into single servings and top with berries and fresh whipped cream.


Tuesday, February 11, 2014

Little Yummies: A Diary Of Making Baby Purees

Recently Sabrina started eating solid foods. And, being the handy make it yourself gal that I am, I got pretty excited about making my own baby food. I enjoyed feeding Ryder the first time around, but to be honest I kind of slacked off when it came to really incorporating lots of different vegetables into his food. Now, I can't get the boy to eat anything. But this time I decided I'd really get into it and expose Sabrina to lots of different foods - creatively.
 
I didn't tread these waters un-educated. I have an excellent website that I use as a guide for introducing babies to solid foods as well as coming up with good ideas for different food mixtures. This amazing, brilliant and easy to use guide is simply titled: http://wholesomebabyfood.momtastic.com/. They have all kinds of information on food and babies, including age charts, diaries, puree recipes, and storage info. Best. Website. Ever.
 
So, armed with knowledge from the website and common sense suggestions from my mom, I dove into this whole new world of baby food making. The latest thing is the pouch. Every mom knows that pouches are super convenient and usually well liked by most babies, and even older kids. Well, now you can make your own!! That's right, they make a sweet little contraption that allows you to fill your own pouches.


WHAT?!? And for all of you that don't like disposable and want to reuse, they even make re-fillable pouches!! Loving it! My sweet sis-in-law bought me this wonderful tool a few months ago; however we did lose it in the fire. But never fear! I have replaced it and now I can't imagine not having it! When using the disposable pouch, it costs approx. 28 cents a piece. Way cheaper than the store bought pouch and you fill it with your own fresh made fruits and veggies! It's called the Infantino Squeeze Station and you can order it online at Walmart or Target.com.
 
So, getting back to this whole making your own baby food business, I usually take the time to make up purees about once a week, and it varies how long they last me because it depends on our schedule for the week. And how many Ryder eats (yes, the child that won't touch veggies with a ten foot pole will scarf them down if they're in a pouch. Toddlers, right?). So today I decided I would document my process and give everyone a play by play of how I go about making these precious little suckers (ha! suckers! ha!).
 
Here are the flavors for today:
Green Bean, Zucchini & Pear with Basil
Carrot, Oatmeal Apple
Sweet Potato Oatmeal
Sweet Potato Apple Cinnamon
 
 
So here's what you start with. Looks like a bunny or a horse would eat it right? Here's what I used:
1 large sweet potato
half a good size zucchini
6 good sized carrots
1 pear
2 apples
approximately 1 1/4 c. green beans
(you could just do one cup but I was using up the bag)
Fresh stuff all the way, except for my green beans. They were home grown then frozen so I figured they would be just as good if not better than store bought. Amount of pouches/feedings will vary depending on the size and amount of your produce. Adjust accordingly. Also, you may want to have some breast milk pumped up, about 1-2 oz per puree batch. You can use water instead if there isn't breast milk available.
 
 
Start out by cooking the produce that needs it. In this case, I cooked the green beans, zucchini, sweet potato and carrots. Since I was combining them anyway I cooked the green beans and zucchini together. Cook the veggies until they are at a mashable consistency.
 
 
Quite a stove full! You also need to cook your grain. I used oatmeal because that's what I had. You can use rice too. I used 1/2 c. of dry oats to 1 c. water. This time around I found it better to get everything cooked up at once first, then blend and fill. Less chaos, especially when you're making more than one type of puree. And when you have a 2.5 year old playing with trains and puzzles under your feet.
 
 
Once it's all cooked, start blending things together.
For the green bean puree, start by blending your pear. Peel and chop it then stick it in the processor. Add a splash of water and blend until it's the consistency of applesauce.
 
 
Pear sauce!
Now you add your green beans and zucchini with about 1-2 oz breast milk or water. I added approximately 1 tsp of basil as well to this very large batch. A note: take it easy with the spices because they can get too strong pretty quick!
 
 
Here is what you get when you're finished processing. I didn't get a blender picture because I had to run it in batches. This made a good size batch!
 
Next we have the Sweet Potato Oatmeal puree.
 
 
I used about half my large sweet potato and half my oatmeal batch. Add 1-2 oz breast milk and process till smooth. I think I had to add a little more water to get the right consistency. Adjust to your own preference.
 
Next it's the Sweet Potato Apple Cinnamon puree.
 
 
Like the pear sauce, you want to process your apple first. Peel and chop, process with water until applesauce consistency.
 
 
Add the other half of the sweet potato, 1-2 oz breast milk and a dash of cinnamon. A note: cinnamon may cause your baby's skin to turn a little red around his/her mouth. Usually it doesn't bother them and it disappears quickly, but do monitor how it affects them.
 
 
Process until smooth and desired consistency.
 
Last, but certainly not least, the Carrot Apple Oatmeal puree.
 

Again, process your apple until you get applesauce. Here's what it looks like.
 
 
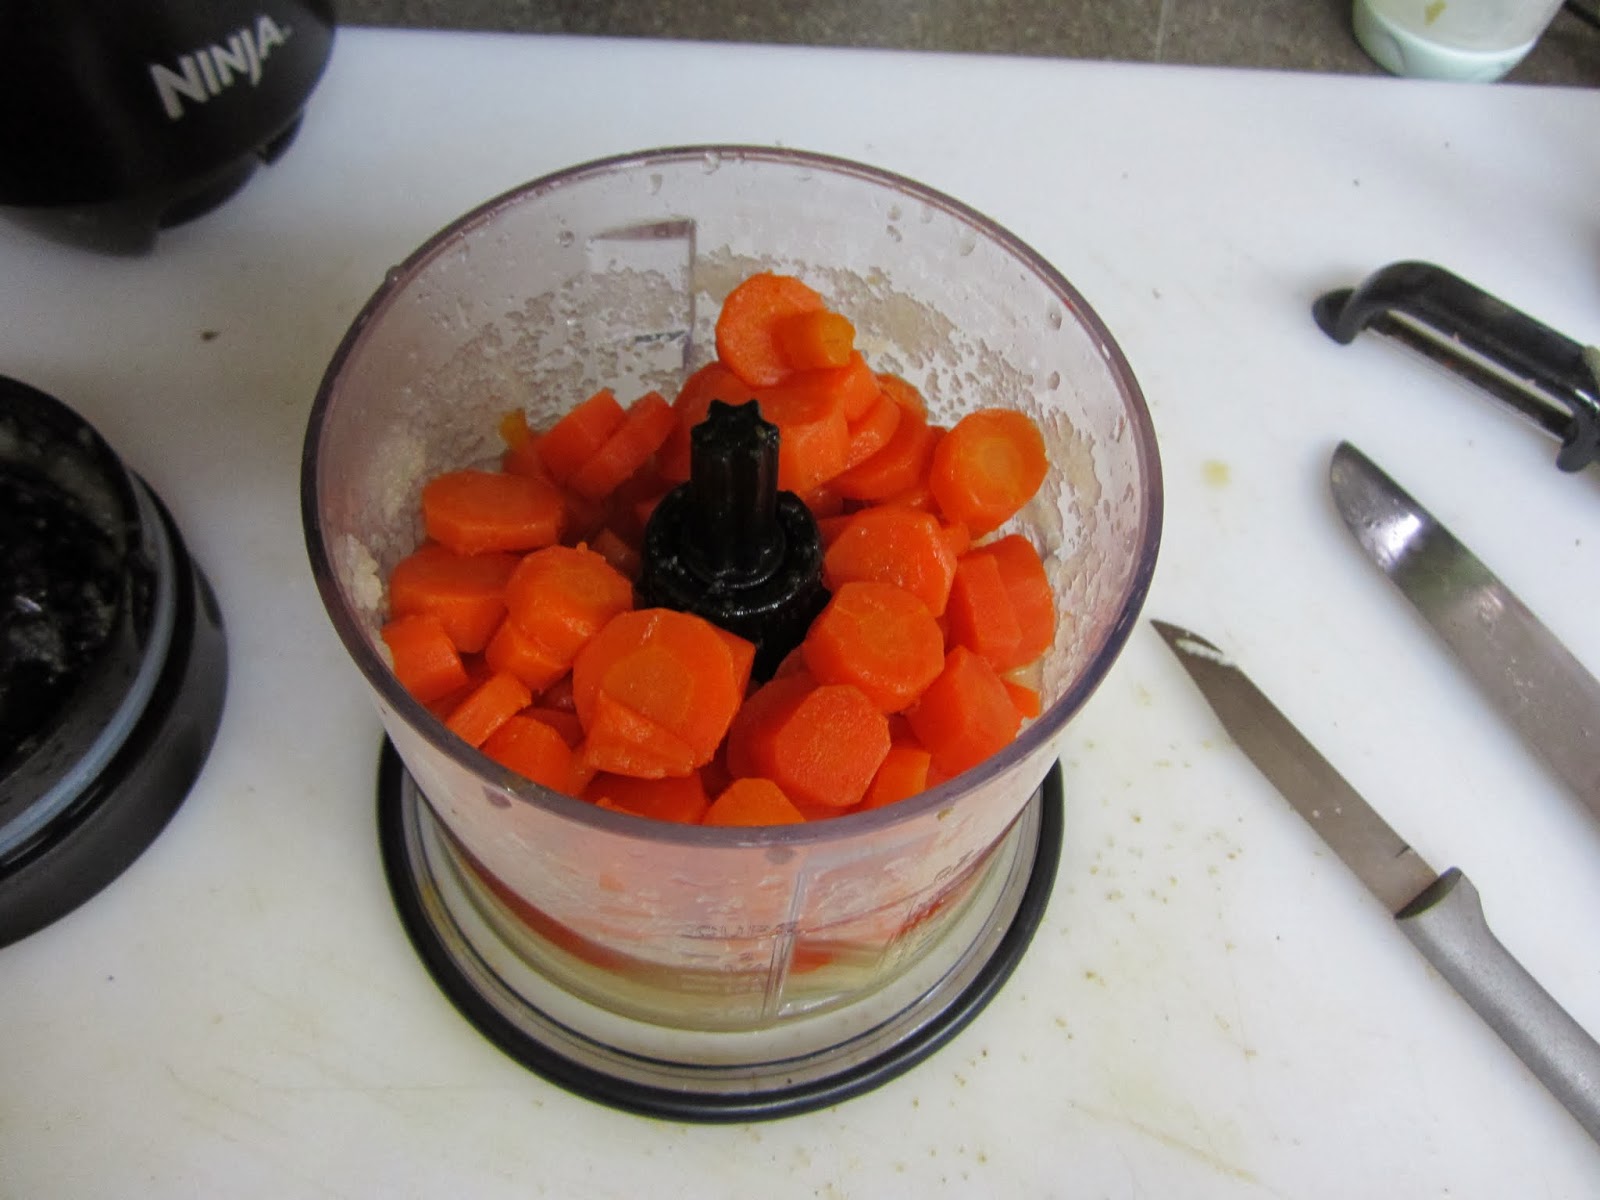
Add your carrots, blend.
 
 
Add oatmeal and a dash of cinnamon. Blend until smooth and desired consistency.
 
 
Here's a beautiful carrot puree!
 
 
Now you have all four purees ready to be put into your pouches!
 

Using your hand-dandy Infantino Squeeze Station, fill your pouches till you just can't fill anymore.


Here is my yield for the day: 5 Carrot, 6 Green Bean, 3 Sweet Potato Oatmeal, and 3 Sweet Potato Apple. Sometimes I have just a smidgen extra, so I give it to Ryder or keep it in a container for later feedings at home.
 
 
Sabrina LOVES her food! She's just scarfing down this batch of carrots! So far, I haven't found anything she won't eat. We might have a little foodie! I wish I got a picture of Ryder sucking down his carrot puree but he was too quick! That's something else that's nice about the pouches; they're great for toddlers and kids too!
 
 
I always made sure my kids had water when they ate food. Keeps things moving the way they should be!
 
Making your own baby food is messy and time consuming, but it gives your baby a good introduction to healthy foods. You could always do a little every day, making one flavor at a time instead of four at once, whatever works for your schedule and lifestyle.
 
I hope you enjoyed my "journaling." Have fun making food!


Wednesday, November 27, 2013

Pumpkin Cake Roll

Wow it's Thanksgiving already...

Here's a family favorite recipe that's been made every Thanksgiving since I can remember - possibly since I was born. My mom found the recipe in a  magazine, and now you can find it in many places, but it is relatively simple and always delicious!


Pumpkin Cake Roll


Preheat oven to 375 degrees. Grease a jellyroll pan; line with wax paper. Grease the wax paper.


Beat 3 eggs for 5 minutes on medium high speed.


Gradually add 1 c. granulated sugar. Stir in 2/3c. pumpkin and 1 tsp lemon juice.


In a small bowl, stir together 3/4 c. flour, 2 tsp cinnamon, 1 tsp baking powder, 1 tsp ginger, 1/2 tsp salt and 1/2 tsp nutmeg.


Fold into pumpkin mix.


Spread batter into prepared pan. Bake for 15 minutes.


While the cake is baking, spread out a clean dish towel and coat with powdered sugar.


Isn't it pretty?


When cake comes out, immediately invert onto the prepared towel.


Carefully peel the wax paper off.


Roll cake, along with towel, into a nice snug roll.


 Cool cake completely.


Beat 1 c. powdered sugar, 1 (8oz) pkg cream cheese, 1/4 c. butter and 1/2 tsp vanilla until smooth.


Unroll cake. Spread cream cheese filling evenly.


Roll the cake up again. Chill for about 1 hour.


Slice into even slices.

YUM!

Thanksgiving heaven.

~*~*~*~*~*~*~*~*~*~*~*~*~*~*~*~*~

Pumpkin Cake Roll

3 eggs
1 c. granulated sugar
2/3 c. canned pureed pumpkin (or 1/3 of a can)
1 tsp lemon juice
3/4 c. flour
2 tsp cinnamon
1 tsp baking powder
1 tsp ginger
1/2 tsp salt
1/2 tsp nutmeg
1 c. powdered sugar
1 (8oz) pkg cream cheese, softened
1/4 c. butter, softened
1/2 tsp vanilla

Preheat oven to 375 degrees. Grease a jellyroll pan; line with wax paper. Grease the wax paper. Set aside.

Beat eggs for 5 minutes. Gradually add sugar. Stir in pumpkin and lemon juice. In a small bowl, mix together flour, cinnamon, baking powder, ginger, salt and nutmeg. Fold into the pumpkin mix. Spread in prepared pan. Bake 15 minutes.

While cake is baking, spread out clean dish towel. Coat with powdered sugar. When cake comes out, immediately invert onto towel. Carefully remove wax paper. Roll cake, along with towel, into snug roll. COOL COMPLETELY.

Beat powdered sugar, cream cheese, butter and vanilla until smooth. Unroll cake. Spread cream cheese filling evenly. Roll cake up. Chill 1 hour. Slice cake into even slices.