background

Thursday, August 16, 2012

Oven Baked Fries

You know when you have that craving for something that's absolutely not good for you? Namely fast food?

That happens to me. A lot. I'm only able to avoid running to the nearest Arby's because it's 40 minutes away. Country living keeps me skinny. Sort of.

Anyway, because of my proximity to those kinds of foods, I'm usually forced to make them myself. Which can be a great success, or a horrible failure.

My mom came up with this amazing recipe for oven baked fries. Ahh, fries. That forbidden fruit. These fries are just as good as restaurant fries, but way better for you. Thanks Mom!

Oven Baked Fries

3-4 medium sized potatoes, sliced to fry size
2 Tbsp butter
Seasoning of your choice

Preheat oven to 425 degrees.


Line a jellyroll pan with foil. Add the butter and put in the oven to melt.


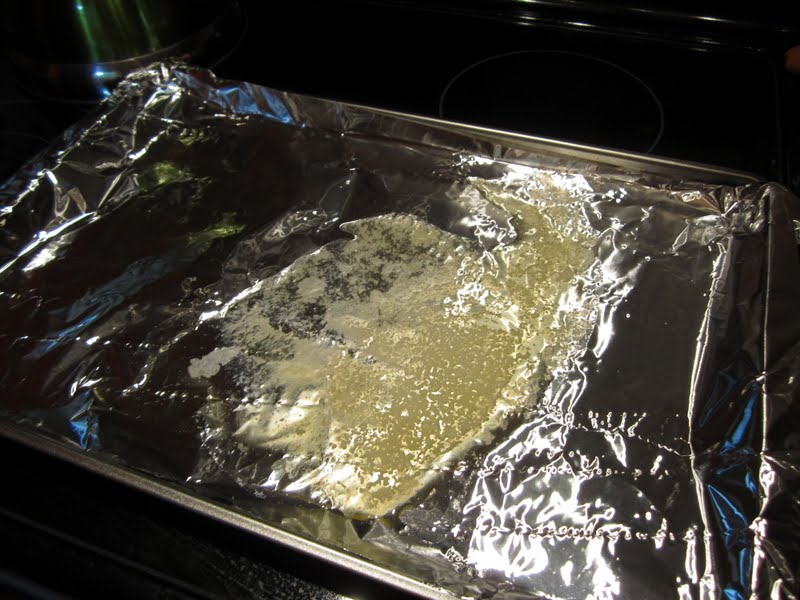
Once the butter melts, take out the pan.


Add the potatoes and coat in the butter.


Season with your choice of seasonings. I used garlic salt and cajun seasoning. Put in the oven for 10 minutes.


 Remove pan from oven. Stir and flip potatoes. Return to the oven for 15 minutes.


If you need a little time before the rest of dinner's ready, you can turn the oven off and leave the fries inside to keep them warm.


Roasted Chicken for Sandwiches

Ever wonder what's IN those pressed, so perfectly even deli meats?

I have.

I've also seen the packages that say, "NO CEREALS! NO FILLERS!"

What's THAT supposed to mean?!

Eww.

This might be strange coming from someone who used to work with deli meat daily, but at least that meat was pretty much the best you could get for "processed" meats.

Why not try something else? Why not go old fashioned and cook your own meat for sandwiches like Lucy Ricardo used to do?

Well, I've come up with a simple yet tasty recipe for roasted chicken, that will put any deli meat to shame.

Roasted Chicken
with Rosemary

2-4 chicken breasts
salt and pepper
1-2 cloves garlic, minced
1 Tbsp chopped fresh rosemary
2-3 Tbsp butter, melted


Preheat oven to 350 degrees. Place chicken in foil lined baking dish.


Salt and pepper both sides of the chicken.


Sprinkle with garlic and rosemary.


Make sure you get both sides!


Drizzle with butter.
Put in the oven and bake for 1 hour.


Ta-da!
Just shred it up and you're ready to go!
Store in ziplocs up to 3 days in the fridge.
Tip: Divide up chicken into small snack size ziplocs and freeze. Then you only have to get out one portion at a time.


Monday, August 13, 2012

Meet Jude

We have a new addition to our family.


Jude Desmond Silverhammer

If you're a Beatles fan, you'll get it.


Ryder is enamored.


Nick is cool with it.


 Our three boys:
Ryder
Jimi
Jude


Jimi is less than thrilled.


My lookout kitty.


Tuesday, August 7, 2012

T-Shirt to Tank Top: A Tutorial

Ever have a T-shirt that you wish was, well, something else? I guess I'm not much of a t-shirt person, so I've been very interested in the idea of re-making them into other more trendy tops. I came up with this method of turning a t-shirt into a tank top!


I made this top for my son's birthday party.
It's basically a "pillowcase" top style, with cinching at the bottom.


Materials:
One T-shirt
Cording or ribbon, enough to go around your shoulders and waist


Start out with a plain t-shirt, preferable one that's a little big on you.


Cut off the sleeves and the band around the neck.


You could stick with this if you wanted the wife beater look, but maybe we should move on.


Cut the front and back "straps" at the seam.


Now turn under the top to create a casing. If you're using cording, make sure it's wide enough to accommodate it. Do this for both the front and back.


Sew the casing.


Now you have something like this.


Trim the excess on the sides and seams.


Now take your cording or ribbon, and using a safety pin, thread it through your casing.


First the front,


Then the back. You'll have to try it on to adjust the fit. Tie it off and either hide it in the casing or let the tie be part of the top.


To cinch the bottom, we'll use the bottom hem as a casing. Pin where you want the tie to be on the bottom hem.


Cut a small slit on the front of the hem, just big enough to fit your cording through but small enough to fit within the hem.


So you end up with a little slit like this.


Now using your safety pin, thread the cording through all around, and adjust your ties to your liking. 
That's all there is to it!


Sorry I don't have better pictures of the end results, this is the best I could do for now.


Sunday, August 5, 2012

Dry Your Own Tomatoes

I've had a wonderfully prolific tomato crop this year, I've been busily making hot sauce and canning tomatoes. But I had a good amount of these small roma tomatoes, and decided I wanted to try drying them. I used a food dehydrator this time, but maybe next time I'll try sun drying.

Anyway, I found this awesome website that gives detailed instructions for every method of drying tomatoes.
http://www.tomatodirt.com/drying-tomatoes.html

To prepare your tomatoes, first you need to core them. This is a step I wish I would have done first instead of after I skinned them. The process was a lot longer because I didn't do it first.

Next you need to skin them. Bring a large pot to a rolling boil.


Score and "X" on the bottom of each tomato. 


Drop 4-5 tomatoes into the boiling water for 30 seconds to a minute.


Remove with a slotted spoon.


Immediately drop them into ice water. The peel will come off easy now.


Cut the tomatoes in half and place cut side up on the screens from your dehydrator.
(I put mine on wax paper because I didn't want the juice to drip, but I ended up taking them off of it because it wasn't drying fast enough. Next time I'll just skip the wax paper.)


Let tomatoes dry for about 8-12 hours, until tomatoes are dry and not tacky. Check them periodically to make sure you don't already have some finished tomatoes.


I stored mine in a jar but you can also store them in freezer bags or vacuum bags.


Ryder's Spongebob Squarepants 1st Birthday Party!

Ryder is 1!!! It's been a year since that little cutie first graced us with his presence in this world. We had an awesome celebration on his actual birthday with just family, then a blow out lake party the next day.


Ryder opening his gifts.


Ryder Trucking Company Truck


I always wanted to get him one of these!
His Grammy and Poppy searched for a year to find this awesome vintage toy truck. It's all metal and the back doors open. They don't make these anymore!


Ryder's favorite part was the tissue paper.


Ryder's Spongebob Squarepants Lake Party


Tablescape


Jellyfishing!


Spongebob Island Cake


Fruit Platter


The menu consisted of Krabby Patties, which were slider burgers. 
We also had these french fry chips.


Mom came up with these fry envelopes.


"Water would be nice!" - Spongebob


Bubblestand


Shaded beach.


Nick set up this amazing fire hose sprayer that the kids could play in, and it also kept the area a little cooler.


Gracie and Ava playing in the fire hose.


Pirate ship - look familiar?


Canoe playing!


Kiddie pool playing.


Chow!


Oh yeah, family is cool!


CAKE!


I think he liked it!


Opening cool gifts! Thanks everyone!


Pops helping Ryder jam!


Our favorite wrapped gift!


The party was a blast and the kids seemed to have a great time!