background

Friday, February 21, 2014

Scrap Fabric To Hairpiece: Pant Cuff Clip

Little girl bows and hair clips are so much fun! There are so many ways you can make them; the possibilities are endless! I love dressing my daughter up with a bow, and I can't help but want every type I see! Lately I've been eyeing these more sophisticated type bows/hair clips that lay flat against their head. They had been in the back of my mind, secretly tapping at my brain for a diy project spotlight, and the opportunity arrived whilst working on another project.
 
I was working away hemming several pairs of pants, minding my own business, when I realized that I had all these little cut off pieces of fabric in so many neat colors.
 
 
What oh what could I make with them?
 
 
Answer: hair clips.
 
Sweet! Reusing and making neat stuff!
 
Here's what you need to make some of these cute little clips:
 
Cuff cut off from a pant leg approx. 1 1/2 inches tall
(size can vary depending on the size you want but this is based on the ones I made.)
coordinating thread
sewing needle
felt for backing
clip of choice, I chose the alligator clip
button for the center
hot glue or E6000
 
Alright, as I said, you start with a piece cut off from a pant leg
 
 
What was handy about this is that it already had a finished hem on one edge.
 
 
Take your sewing needle and do a large running stitch all along the rough edge (the edge you want gathered).
 
 
Once you sew all the way around, pull the thread to gather up the fabric. Tie it off securely.
(In this picture I had tried to do this running stitch on the machine and found that it is much easier to hand sew it).
 
 
Here's what you got so far.
You might need to press it to help it lay flat.
 
 
And that's it. Bow made. Now all you have to do is finish it off.
 
 
Select and sew on your button. This will cover up your goofy looking center.
Cut a circle out of the felt big enough to cover the back side of the goofy looking center. I traced my button to get the right size.
 
 
This will also give you a smooth surface to glue your clip to.
 
 
Using either hot glue or E6000, glue the felt to the backside of the bow.
 
 
Glue your clip to the felt.
 
 
Finished!
I love all the different buttons you can use to dress these up!
 
 
So cute!!
 
 
My precious girl! She's looking so good in her new clips!
 
Now, for the headbands. I wanted a slimmer, sleeker band to go along with these chic little clips, so I decided to make them out of big people bands.
 
 
Just bought a package of women's hair bands. I used Sabrina's head as a measurement and pinned the size.
 
 
I looped it over itself and hand sewed it together. This way I can let it out later and it can be used at its original size in the future. Also, the loop makes a nice place for the clips to be attached and keeps them from sliding all over the band.
 
 
Darling, precious, and sooo sweet!


Tuesday, February 11, 2014

Little Yummies: A Diary Of Making Baby Purees

Recently Sabrina started eating solid foods. And, being the handy make it yourself gal that I am, I got pretty excited about making my own baby food. I enjoyed feeding Ryder the first time around, but to be honest I kind of slacked off when it came to really incorporating lots of different vegetables into his food. Now, I can't get the boy to eat anything. But this time I decided I'd really get into it and expose Sabrina to lots of different foods - creatively.
 
I didn't tread these waters un-educated. I have an excellent website that I use as a guide for introducing babies to solid foods as well as coming up with good ideas for different food mixtures. This amazing, brilliant and easy to use guide is simply titled: http://wholesomebabyfood.momtastic.com/. They have all kinds of information on food and babies, including age charts, diaries, puree recipes, and storage info. Best. Website. Ever.
 
So, armed with knowledge from the website and common sense suggestions from my mom, I dove into this whole new world of baby food making. The latest thing is the pouch. Every mom knows that pouches are super convenient and usually well liked by most babies, and even older kids. Well, now you can make your own!! That's right, they make a sweet little contraption that allows you to fill your own pouches.


WHAT?!? And for all of you that don't like disposable and want to reuse, they even make re-fillable pouches!! Loving it! My sweet sis-in-law bought me this wonderful tool a few months ago; however we did lose it in the fire. But never fear! I have replaced it and now I can't imagine not having it! When using the disposable pouch, it costs approx. 28 cents a piece. Way cheaper than the store bought pouch and you fill it with your own fresh made fruits and veggies! It's called the Infantino Squeeze Station and you can order it online at Walmart or Target.com.
 
So, getting back to this whole making your own baby food business, I usually take the time to make up purees about once a week, and it varies how long they last me because it depends on our schedule for the week. And how many Ryder eats (yes, the child that won't touch veggies with a ten foot pole will scarf them down if they're in a pouch. Toddlers, right?). So today I decided I would document my process and give everyone a play by play of how I go about making these precious little suckers (ha! suckers! ha!).
 
Here are the flavors for today:
Green Bean, Zucchini & Pear with Basil
Carrot, Oatmeal Apple
Sweet Potato Oatmeal
Sweet Potato Apple Cinnamon
 
 
So here's what you start with. Looks like a bunny or a horse would eat it right? Here's what I used:
1 large sweet potato
half a good size zucchini
6 good sized carrots
1 pear
2 apples
approximately 1 1/4 c. green beans
(you could just do one cup but I was using up the bag)
Fresh stuff all the way, except for my green beans. They were home grown then frozen so I figured they would be just as good if not better than store bought. Amount of pouches/feedings will vary depending on the size and amount of your produce. Adjust accordingly. Also, you may want to have some breast milk pumped up, about 1-2 oz per puree batch. You can use water instead if there isn't breast milk available.
 
 
Start out by cooking the produce that needs it. In this case, I cooked the green beans, zucchini, sweet potato and carrots. Since I was combining them anyway I cooked the green beans and zucchini together. Cook the veggies until they are at a mashable consistency.
 
 
Quite a stove full! You also need to cook your grain. I used oatmeal because that's what I had. You can use rice too. I used 1/2 c. of dry oats to 1 c. water. This time around I found it better to get everything cooked up at once first, then blend and fill. Less chaos, especially when you're making more than one type of puree. And when you have a 2.5 year old playing with trains and puzzles under your feet.
 
 
Once it's all cooked, start blending things together.
For the green bean puree, start by blending your pear. Peel and chop it then stick it in the processor. Add a splash of water and blend until it's the consistency of applesauce.
 
 
Pear sauce!
Now you add your green beans and zucchini with about 1-2 oz breast milk or water. I added approximately 1 tsp of basil as well to this very large batch. A note: take it easy with the spices because they can get too strong pretty quick!
 
 
Here is what you get when you're finished processing. I didn't get a blender picture because I had to run it in batches. This made a good size batch!
 
Next we have the Sweet Potato Oatmeal puree.
 
 
I used about half my large sweet potato and half my oatmeal batch. Add 1-2 oz breast milk and process till smooth. I think I had to add a little more water to get the right consistency. Adjust to your own preference.
 
Next it's the Sweet Potato Apple Cinnamon puree.
 
 
Like the pear sauce, you want to process your apple first. Peel and chop, process with water until applesauce consistency.
 
 
Add the other half of the sweet potato, 1-2 oz breast milk and a dash of cinnamon. A note: cinnamon may cause your baby's skin to turn a little red around his/her mouth. Usually it doesn't bother them and it disappears quickly, but do monitor how it affects them.
 
 
Process until smooth and desired consistency.
 
Last, but certainly not least, the Carrot Apple Oatmeal puree.
 

Again, process your apple until you get applesauce. Here's what it looks like.
 
 
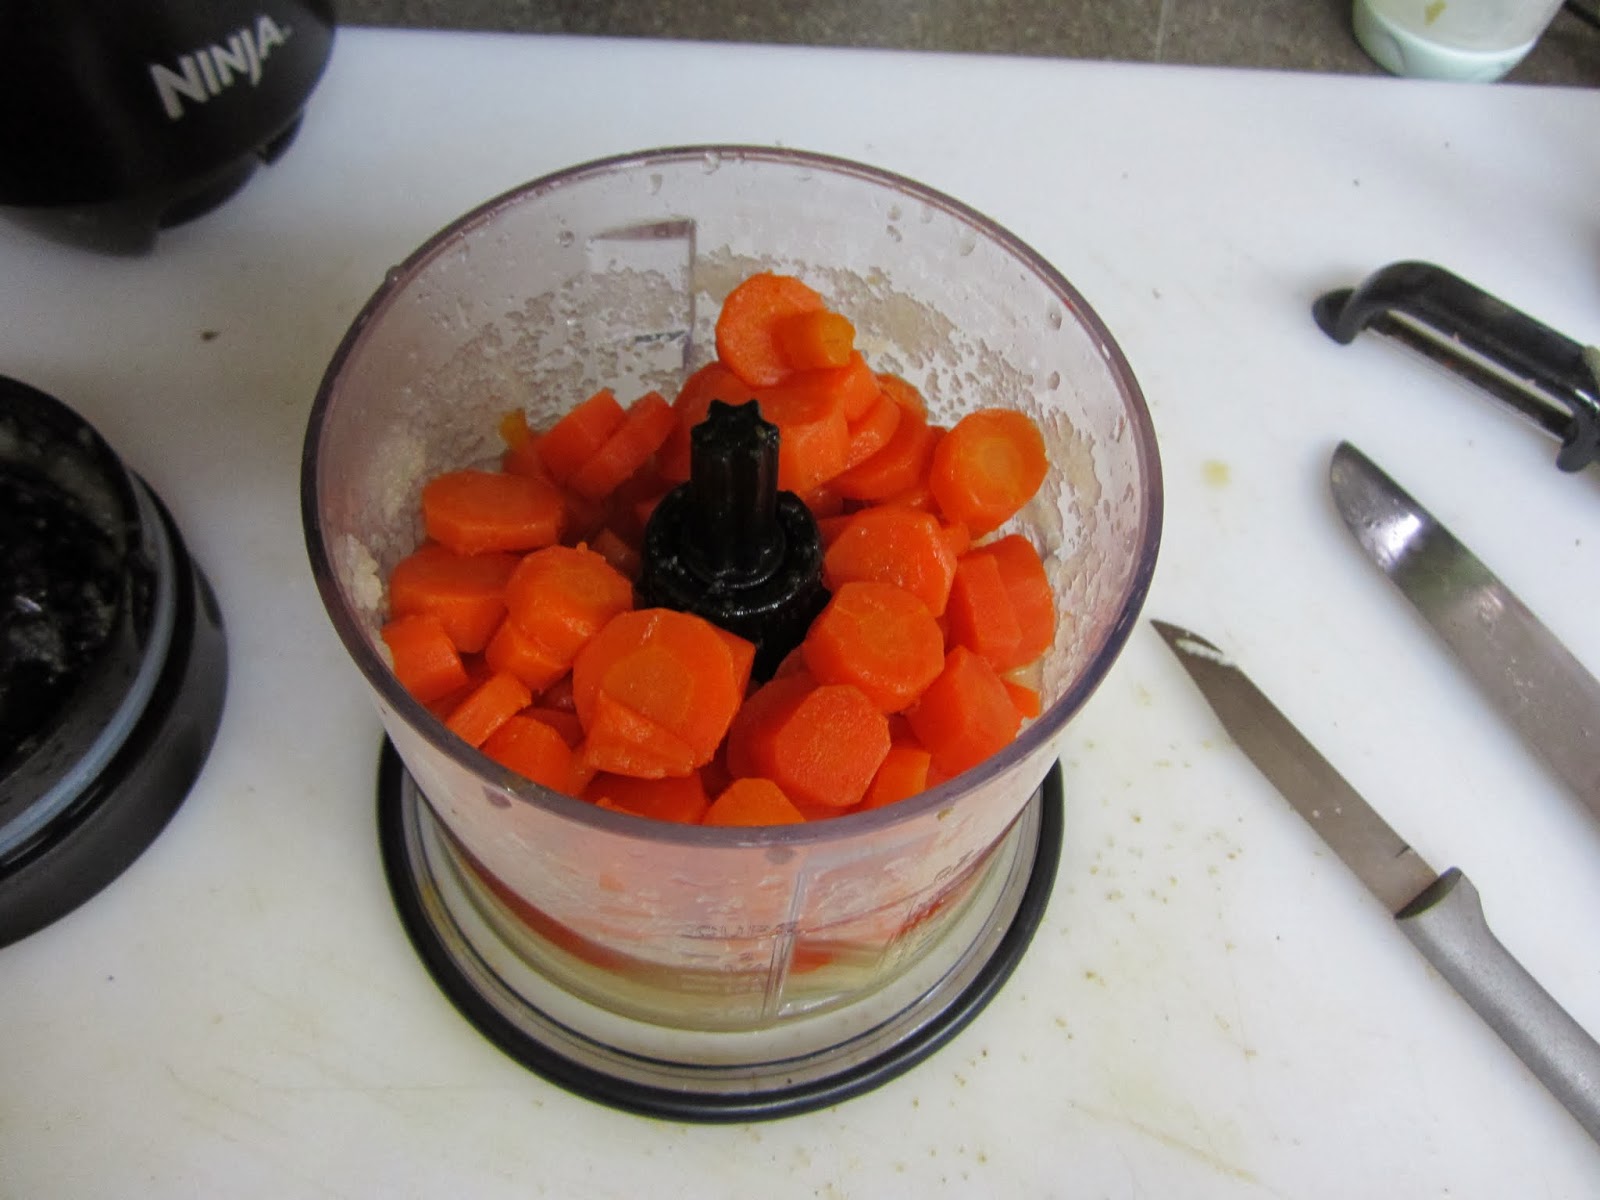
Add your carrots, blend.
 
 
Add oatmeal and a dash of cinnamon. Blend until smooth and desired consistency.
 
 
Here's a beautiful carrot puree!
 
 
Now you have all four purees ready to be put into your pouches!
 

Using your hand-dandy Infantino Squeeze Station, fill your pouches till you just can't fill anymore.


Here is my yield for the day: 5 Carrot, 6 Green Bean, 3 Sweet Potato Oatmeal, and 3 Sweet Potato Apple. Sometimes I have just a smidgen extra, so I give it to Ryder or keep it in a container for later feedings at home.
 
 
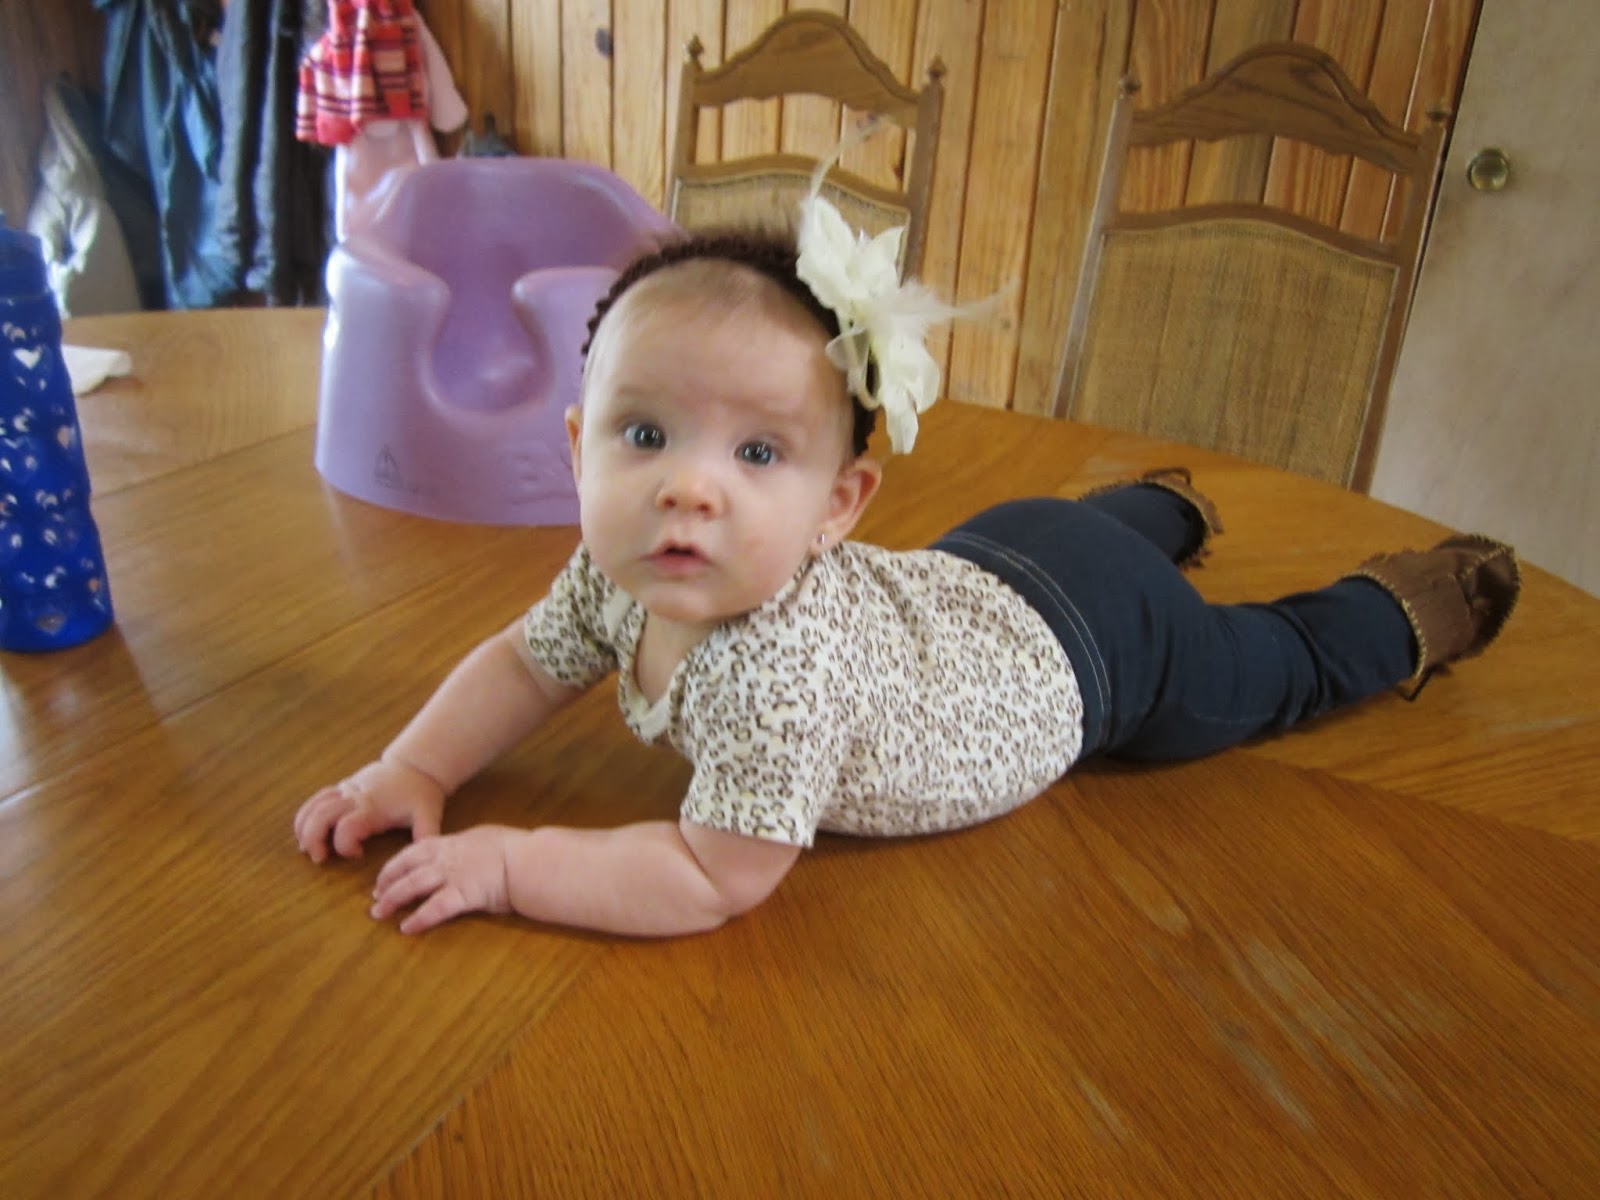
Sabrina LOVES her food! She's just scarfing down this batch of carrots! So far, I haven't found anything she won't eat. We might have a little foodie! I wish I got a picture of Ryder sucking down his carrot puree but he was too quick! That's something else that's nice about the pouches; they're great for toddlers and kids too!
 
 
I always made sure my kids had water when they ate food. Keeps things moving the way they should be!
 
Making your own baby food is messy and time consuming, but it gives your baby a good introduction to healthy foods. You could always do a little every day, making one flavor at a time instead of four at once, whatever works for your schedule and lifestyle.
 
I hope you enjoyed my "journaling." Have fun making food!


Friday, February 7, 2014

"I Hear The Drizzle Of The Rain..."

"...like a memory it falls."
 
Just enjoying a cappuccino on a drizzly day while the kids are napping and my music is playing.
Makes me feel all warm inside, like I can close my eyes and picture my view of the pond at home.
Ironically, the crackle of the fire in the stove is comforting too.
There is peace.
For now.
Give it a half hour and fabulous whirlwind #2 will be raring to go.
 
Anyway...
 
Anyone else tired of being sick? Anyone? Anyone? We have been plagued with yet another sickness here in the last week or so, a nasty cold bug. I'm still sleeping in the recliner in the living room. But at least I'm SLEEPING! We're doing better but it's still reminding us here and there that it will get it's revenge someday, in a year or so.
 
So, fun news! Sabrina got her ears pierced!!
 
 
She was lookin' so cute that I had to do a little photo session!


Notice the moccasins? So cute right? I've been loving all the pictures on pinterest of little girls in their moccasins. Since I refuse to pay an arm and a leg for shoes she'll outgrow in a couple of months, I decided to make them myself. Success! Unfortunately I did not document my process so no diy post for those, but I have a couple of posts coming up in the future, when I actually finish the crafts. It's hard when you suddenly have nothing. I'm so used to just having crafty stuff stocked but now I have to replace everything. And you never can remember everything at once, you always go,"oh yeah, I need that," and, "oh yeah I don't have that anymore." It's a gradual process and I will win.
 
 
My birthday was last week. Nick got me my cappuccino machine! Oh yes! Loving the coffee!! And the Beatles. This would be my buddy icon back in the aim days :)
 
 
Ryder is growing up too fast. He's too smart for his own good so unfortunately potty training is still in a sabbatical. I might revisit the idea after his cousins' visit in a few weeks.
 
 
House progress report: the spot for the new house has been cleared and is ready for the foundation.
Nick has been super busy this week with work so he hasn't had a chance to get back out there.
 
 
It's hard to see what's going on in a picture, but trust me, it's exciting.
 
Little by little things are coming together. I can't wait to see some real construction for the house go up; it will make it so real! Will keep updating as things start happening.
 

The Silver Quarter: 25th Birthday Party!

Now, and only now, I will reveal my age.
 
25.
 
Hello insurance break!
 
Called not really because apparently they quit doing that.
 
Drat.
 
Oh well, turning 25 has other perks. An awesome party with my friends that I hardly get to see anymore is one!
 
 
The theme was Silver 25th. Duh! Who says you can't have a silver anniversary of your birth? My mom got it all together, and then couldn't come because of a mean cold bug that's been circulating around our family. We almost had to cancel because of me, but my friend(s) swooped in and saved the party!
 
We had a lovely decorated dessert table and a tasty chili bar.


Silver frosted dessert table.
 

Silver dusted cake balls.
 
 
Chocolate Coffee Truffles with silver coffee bean.
 
 
White/silver candy and snack bar.
York peppermint patties, mini candy bars, kisses, Hershey's nuggets, white chocolate pretzels, cake pops and mints. You have to have mints when you eat chili!
 
 
Chocolate mousse in chocolate cups with silver 25 caps. I LOVE mousse!!
 
 
Mom made this awesome "25" emblem. Just made the table!
 
 
This has been and interesting few months, and I'm sure that there will be more interesting times in the future, but I'm so glad to have friends and family that love and support me and my family.
 
 
To the future! And another year to enjoy together!